Planting an agave is a thorny endeavor
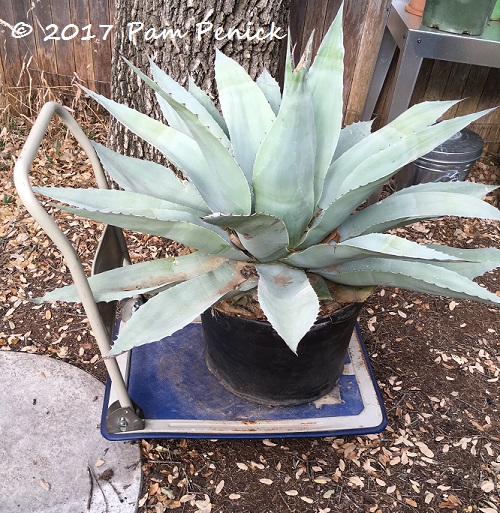
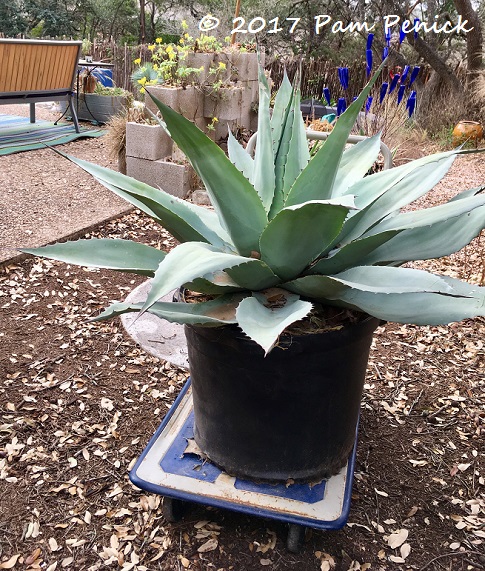
Last weekend, after creatively wrestling this bad boy out of the car, my family helpers and I slid it onto a utility cart and rolled it into the back yard. This new whale’s tongue agave to replace Moby, while far from mature-size, is still large enough at 15 gallons to make planting — heck, even unpotting — a challenge. Especially as I would be planting it on my own, with everyone else at work or school.
For the uninitiated, whale’s tongue agaves, like most agaves, are well armed, with hooked thorns along the edge of every leaf and a sharp terminal spine at the end. The leaves are stiff (meaning they can poke you good) but also fragile; if you tip the plant on its side, the leaves can break and your beautiful plant will be permanently marred.
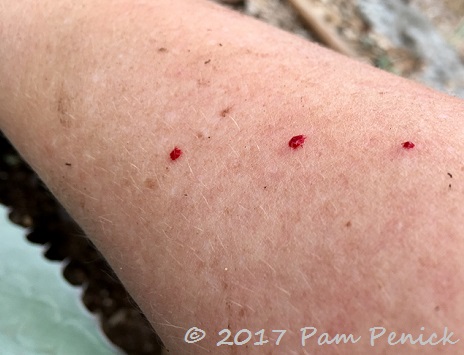
So how to plant it? First of all, you must wear eye protection. I recommend wrap-around safety goggles. You also need thick work gloves, sturdy and protective shoes, and, if you’re smart, a long-sleeved work shirt and pants. I wore short sleeves because it was hot, and I caught a few spines along my arm.
A mere flesh wound — no biggie. Definitely protect your eyes though.
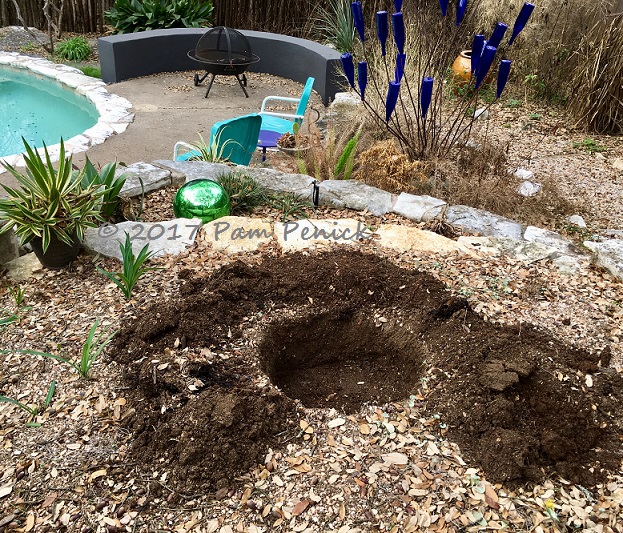
After removing Moby last fall, I cleaned years of decomposing leaves out of the planting bed and added a yard of gravelly soil. It had settled over the winter, so it was prepped and ready for easy digging. I dug a hole just a little wider than the pot (since the soil was already loose, not compacted; otherwise, I’d have dug a wider hole to loosen things up for growing roots) and exactly as deep as the root ball. You don’t want an agave to settle deeper after a few rains; that leads to rot. So plant it high, but don’t leave the root ball exposed.
But first things first: how to actually unpot and plant this monster? I had to get creative. The plant was very heavy, but I was able to roll it close to the hole on the utility cart. I carefully slid it off the cart (this may have been when it bit my arm) and wrestled it over to the hole.
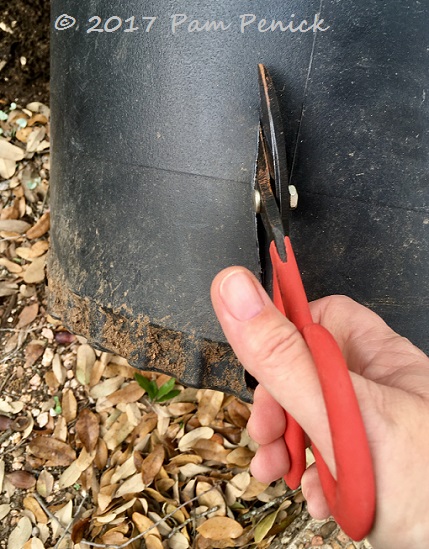
Tipping it over to unpot was impossible due to its weight and all those spines, plus I didn’t want to risk breaking the leaves. Instead I leaned the pot against a mound of dug-out dirt in order to access the bottom of the pot. Using tin snips, I cut the nursery pot off the plant, starting at the bottom drainage hole and working my way up. It cut more easily than I expected, and the pot was opened up in just a few minutes…
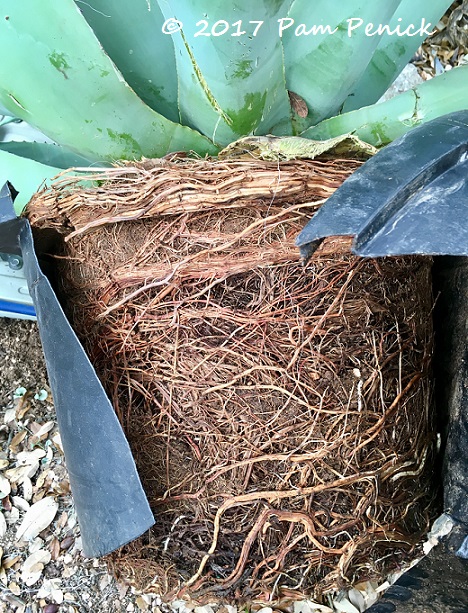
…revealing a mass of roots that had circled around the pot because there was nowhere else to go. I did what I do with all plants that are rootbound: I took a sharp tool (a shovel, utility knife, or pruning saw will work) and made deep, vertical cuts in four places on the lower half of the root ball. I also teased loose the roots circling around the top of the pot. It may seem like you’re hurting a plant to cut into its roots like that, but it actually encourages the roots to stop circling and grow outward into the soil.
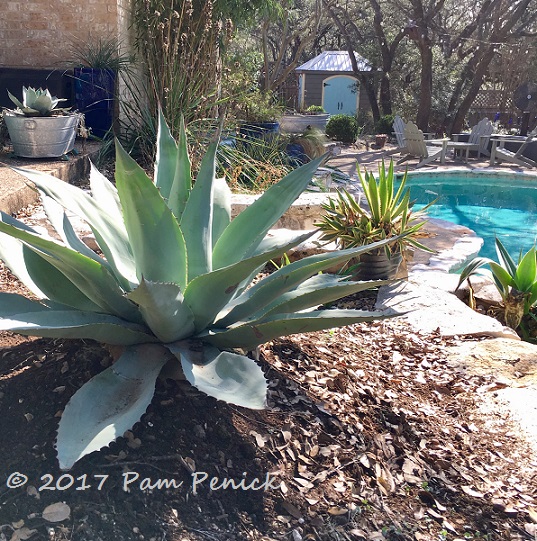
Getting the agave into the hole proved tricky too. Because of its spines and weight, I couldn’t just pick it up and plop it in. I sat on the ground, leaned under the leaves (wearing my safety goggles!), and rocked the plant from side to side to edge it close to the hole. Then I leaned back and pushed with my legs to try to control its slide into the hole. Somehow it worked, and I didn’t even get stabbed! I backfilled soil, patted it firm, and stood back to admire Moby2. I’ll mulch this bed with gravel for good drainage — maybe after the live oak leaf drop, which seems to be starting early this year.
I welcome your comments; please scroll to the end of this post to leave one. If you’re reading this in a subscription email, click here to visit Digging and find the comment box at the end of each post.
_______________________
Digging Deeper: News and Upcoming Events
2/25/17: Come to my talk at the Wildflower Center. I’ll be speaking at the day-long Native Plant Society of Texas Spring Symposium at the Lady Bird Johnson Wildflower Center in Austin. My talk is called “Local Heroes: Designing with Native Plants for Water-Saving Gardens,” and it’s about creating water-wise home gardens that don’t sacrifice beauty. The symposium is open to the public. Click here for registration. I’ll be offering signed copies of my books, The Water-Saving Garden and Lawn Gone!, after my talk ($20 each; tax is included). I hope to see you there!
Get on the mailing list for Garden Spark Talks. Inspired by the idea of house concerts — performances in private homes, which support musicians and give a small audience an up-close and personal musical experience — I’m hosting a series of garden talks by design speakers out of my home. The upcoming talk with James deGrey David has sold out, but join the Garden Spark email list for speaker announcements delivered to your inbox; simply click this link and ask to be added. Subscribers get advance notification when tickets go on sale for these limited-attendance events.
All material © 2006-2017 by Pam Penick for Digging. Unauthorized reproduction prohibited.


That is an endeavor, all right. In addition to the safety tips learned, it’s good to see Moby2 now enjoying your delightful garden. Long live Moby2!
All hail the new whale! 😉 —Pam
Wow, Pam, what a job. Glad you are relatively uninjured. Can you also cut through the roots at the top instead of teasing them apart?
Yes. You can do just about anything to agave roots, I think, without much worry. These are very tough plants. For other kinds of plants, perennials, etc., I am a little more gentle with the top of the root ball, but I still slice through compacted roots in the bottom half and pull it open with my hands. —Pam
Well-done!!!
I’m just glad it’s done, Laurin! —Pam
Great post! After years of trying to save nursery pots, often to the detriment of the plant, I now cut them open just like you do.
For gloves, I wear heavy-duty welding gloves. They provide excellent protection against spines.
One word about cutting the roots: Only do it when planting in DRY soil. If the soil is wet, this could lead to catastrophic rot.
Thanks for the tip about cutting the roots in dry conditions, Gerhard! —Pam
You are a brave woman! Job well done. Moby2 is beautiful. It will grow well the way you mounded it.
It did prove a good spot for the original Moby, so I hope Moby2 will be happy there as well. —Pam
Wow, you did it all by yourself! That was a feat. Moby2 looks good. Hope you drank a glass of wine or ate something yummy afterward to reward yourself.
I probably just collapsed in bed! —Pam
Great job! You’re braver than I am. There’s a reason most of my agaves are still small…
I usually plant small too. But Moby’s old spot looked SO empty that I made an exception this time. —Pam
Good tips, Pam. I know that’s a “whale” of a job so I commend you for doing so much of it on your own. That’s part of the reason I got rid of some (most) of my large container agaves – I just couldn’t keep repotting them.
Speaking of which, I need to repot a bunch of agaves and other succulents this spring too. Time to suit up again! —Pam
I’m glad there are intrepid gardeners like you so wimps like me can enjoy growing these spiny beasts vicariously. I’m going to stick with Agave bracteosa.
Ha! Yes, the worst that one can do is give you a paper-cut-like wound. —Pam
I admire your effort. All hail the whale. I buy and plant 4″ or 6″ Agaves…one gallon at most–a whole lot less painful!
Me too — usually. But wow, the impact from a 15-gallon when you really need it! —Pam
Moby2 is a very handsome fella. That sounds like it was quite a lot of work, I wouldn’t have wanted to do it myself, my back aches just thinking about it.
Mine still does, but I’ve been out there every day this week doing the winter cleanup. —Pam
Brave to do this alone. We all do what we want to do, when we want to do it. 😉
Yep, and where there’s a whale, there’s a way. —Pam
Moby v.2 just glows in that last shot; good work! A daunting job — but you shouldn’t have to do much more for years.
Just watch him grow! —Pam
Love this – glad to know I’ve been doing it (mostly) right! 🙂 I purchased 3 Whale Tongue late last Fall, two are in the ground and one is in a big pot. I can’t wait for them to get HUGE!
I thought you were going to put a Vanzie in Moby’s old spot, did I get that confused?
You remember right, Wendy. I have a smaller ‘Vanzie’, and I planted it there last fall. But it was too small for the space so I moved it to a different spot. It would have grown, of course, but I have visitors groups coming this year and next, and I decided to splurge on a bigger plant for Moby’s old spot. —Pam
I’m sharing a helpful tip I received from a reader via email. Thanks, Jeanne! —Pam
“A suggestion, after reading your solo efforts re: transplanting an agave. Try wrapping an old sheet around the sides of the base (after liberating it from the pot) to move it and help position it, moving it sideways, or lifting it back out of the hole to adjust depth, etc. This also works extremely well for sotols, especially for weeding under them – you can “imprison” the leaf stalks in the sheet by laying it on the ground around the sotol, then slowly raise it up around the perimeter and knot the sheet ends after you get things workable to your liking. There will still be blood, but a lot less, and a lot less cussing from being snagged. I use a sheet, too, for moving big plants from place to place in the yard, after I’ve dug them up. If I have help, we pick up the sheet ends and go; if solo, wrap the sheet around the base, grab the ends and drag it over to the new hole. Enjoying your website! -Jeanne”